MushBarn Mushroom Grow Kit Instructions
What's Included?
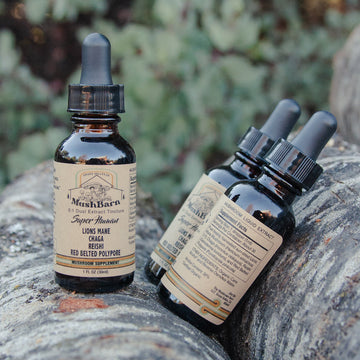
Your MushBarn "Farm on Table" Grow Kit contains:
- One fully colonized mushroom fruiting block
- One empty spray bottle
- Virtual growing instructions
Supplies Needed
- Distilled water, spring water, well water, or filtered water
- Avoid chlorinated tap water whenever possible
Ideal Growing Conditions
- Temperature: 65–75°F
- Light: indirect sunlight
- Location: Kitchen counter, shelf, or other indoor area where you'll see it regularly
Time Until Harvest
- Baby mushrooms typically begin forming within 7–14 days after opening the fruiting site
- First harvest is usually ready in 10–18 days
Yield Potential
- Most kits produce 1–3 harvests ("flushes") over several weeks
Before You Begin
A Note About Mushroom Spores
As mushrooms mature, they release spores. While harmless for most people, heavy spore loads can create dust-like deposits on nearby surfaces and fabrics.
For best quality and freshness, harvest mushrooms before they become overripe and begin releasing large amounts of spores.
Cooking Your Harvest
Fresh mushrooms are delicious simply sautéed in olive oil with salt and pepper for 10–15 minutes. They can also be added to soups, stir-fries, pasta dishes, tacos, and countless other recipes.
Available MushBarn Grow Kits
- Lion's Mane
- Blue Oyster
- Pearl Oyster
- Chestnut
- Garden Giant
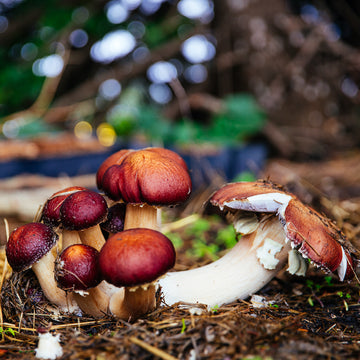
Species Notes
Oyster Mushrooms
Our fastest-growing and most dramatic mushroom varieties.
Once baby mushrooms ("pins") appear, they can double in size daily. Oyster mushrooms love humidity, so frequent misting produces the largest and healthiest clusters.
Lion's Mane
One of our favorite gourmet mushrooms.
Lion's Mane can be slower to start but grows rapidly once fruiting begins. Avoid overwatering before mushrooms form and keep the kit away from fans, heaters, air conditioners, or other sources of moving air.
How to Grow Your MushBarn Kit
Step 1: Place Your Kit
Set your grow kit indoors in a location with:
- indirect light
- Stable temperatures
- Minimal air movement (not right by a fan or vent)
A kitchen counter works perfectly.
Step 2: Prepare the Spray Bottle
Open the box lid and remove the spray bottle.
Fill it with clean water and set it aside.
Step 3: Create the Fruiting Site
Keep the cardboard lid on the box.
Punch out the perforated circle on the top of the box lid.
Through this opening, locate the plastic mushroom bag underneath.
Using a clean sharp utensil, make a small 1-inch "X" cut through the plastic bag directly beneath the punched-out hole. Press about 1 inch into the substrate.
Important: The mushrooms will emeerge through this X-shaped opening in the bag and grow up through the hole in the lid. The lid remains on throughout the growing process.
Step 4: Begin Misting
Mist directly through the hole in the lid so water reaches the X-shaped cut in the plastic.
The opening in the bag should remain aligned with the hole in the box.
Spray several times once per day until baby mushrooms begin to form.
Avoid overwatering during this stage. Standing water inside the box can encourage contamination.
Step 5: Watch for Baby Mushrooms
Once small mushroom pins begin appearing at the opening:
- Increase misting to 3–5 times daily when possible, pumping the mister several times each session.
- Keep the developing mushrooms moist but not soaked
Over the next week, you'll see the mushroom cluster push through the hole and rapidly increase in size.
Step 6: Maintain Humidity
Mushrooms thrive in humid conditions.
If you're unable to mist several times per day, loosely drape a clear plastic bag over the emerging mushroom cluster to help retain moisture. Do not seal the bag tightly.
Step 7: Harvest
Most mushrooms are ready to harvest 4–7 days after pinning begins.
Harvest when:
- The mushrooms are fully developed
- Before they become overripe or begin releasing significant spores
To harvest:
- Gently grasp the cluster at its base
- Twist and pull slowly until it releases from the block
Avoid cutting mushrooms off the block, as leftover stumps can interfere with future flushes.
Growing Additional Flushes
After your first harvest:
- Tape over the X you made in the bag and put the lid back on.
- Place the kit in a darker area for approximately one week, or inside the refrigerator.
- Allow the mycelium to rest and recover.
After 7–10 days:
- Reopen the hole
- Check for new baby mushrooms
- Repeat the fruiting process
The first and second flushes are typically the most productive.
When You're Finished
Don't throw your kit away.
Remove the block from the box and:
- Bury it in your garden
- Add it to mulch beds
- Place it in compost
With regular watering, many kits continue producing mushrooms outdoors for months.
Questions?
Email us anytime:
Happy growing!
— The MushBarn Team